News |
|
January 13, 2005 22:39
Plumbing BeginsAs you see from the pictures, some progress on plumbing the bathroom has been accomplished. Plans for tomorrow include finish dryfitting the remainder of the plumbing in the bathroom, installation of the buffalo box, and tapping into the feed line and sewer pipe with new plumbing. Hopefully we can finish out the floor and tear into the ceiling as well. We'll be a day behind schedule, but otherwise ok.
January 11, 2005 15:43
Plans for the near futureThose of you paying attention to the house pictures will see some progress. Now finally we're working on progress that is more significant. The immediate goal is to get the upstairs bathroom functional. Here is an expected (but likely to change) timeframe for work toward that goal: Wednesday:
- Dryfit all upstairs bathroom plumbing. Friday:
- Finish all electrical in bathroom. Monday:
- Insulate walls. Wednesday: - Set toilet - Tile shower stall - Set vanity top - Plumb vanity - Set medicine cabinet At this point, the bathroom will be functional and I'll be able to move in. Once I'm living in the house, I'll be able to accomplish things at least 4-6 times faster than I am right now.
December 16, 2004 20:16
Attic WorkNow that the attic ladder is in place, we started working on the attic itself. We placed a post upon which we mounted two junction boxes, the higher one for a switch and outlet. The switch turns on the light mounted on the rafters. We've started to disassemble the current fire hazard ratsnest known as the electrical system in the house. After a bit of investigation, we've determined that all outlets and light fixtures upstairs, all ceiling fixtures downstairs, and one of the lamps in the downstairs bathroom are all on the same 14 gauge circuit.... with a 30 amp breaker. To make it more fun, all the main wiring for this monster circuit is knob and tube wiring. OLD knob and tube wiring. With questionable excuses for insulation. The joints also had much to be desired. Splicing with electrical tape is ok for a temporary quick and dirty fix, but 70 years later, I think we're stretching the defition of "temporary". Amazingly enough, someone recently decided to run a separate circuit for the 220V outlet to be used by the window unit. Since it looked like it had been run in the last 30 years, we co-opted it to provide electricity to the attic. As we rip into the walls downstairs, we'll pull the old outlets and put in new wiring. Each room will get its own circuit, and three extra circuits will be run for hairdryers. Anyone want to buy some porcelain knobs? I got a bunch of them! They're antiques! After providing some illumination on the subject, we hauled the rest of the 16 ft 2x10's from the downstairs hallway up into the attic. Once that feat was accomplished we set up two of them as joists, sistered onto the 2x4's that currently hold up the ceiling. They're slightly more stable. The entire floor doesn't wobble when I walk on them. I think that's a good thing.
December 15, 2004 01:36
Attic LadderThe attic ladder has been installed in the upstairs hallway. This is truely an amazing thing. Previously, access to the attic was via a small hole in the upstairs bathroom. Most unacceptable. Also, the attic can now be used as a storage area. Or WILL be used as a storage area as soon as I haul up another 9 16 ft 2x10 joists and the 3/4" plywood sheets. Plenty of room up there though, so it'll be worth it. A place to stash my junk and forget about it, lest I leave it lying all over the house where I might actually be forced to do something about it. Thank goodness for small miracles. Now that this crisis has been resolved, we can patch the ceiling in the bathroom, get the electrical in there done, and finish the floor, then pull up the floor because we'll forget something important, like... oh.. plumbing maybe. So yeah.. plumbing. That might be important.
December 08, 2004 23:40
ProgressToday I made a run by Lowes and purchased 11 16ft 2x10's which just so happened to be cheaper than the 2x8's by about 40%. We originally were going to use 2x8's sistered onto the 2x4's in the attic to provide additional support for the pulldown attic door and flooring for storage. The attic ladder and sheets of plywood were also purchased. The big toy of the day was the nailgun. Tested on random parts of the house, the nailgun does in fact appear to work as intended, so we then continued the sistering joists job in the bathroom. This makes nail insertion SO much easier. The bathroom floor should be completed friday and work will commence on the plumbing. Hope to have a functional upstairs bathroom by the end of next week.
December 06, 2004 23:15
Bathroom and WiringFor those who have checked out the new images, we are finally going forward on the upstairs bathroom. Yes, I realize it's just two joists, but that's forward. And slightly upward as we're leveling out the floor. The northwest corner has been defined as level and everything else is being adjusted to match. The original joists are approximately 3 1/2 inches below level on the northeast corner. Five of these new joists will be sistered to the original ones as a new support for the plywood floor. Fixtures for the bathroom have been purchased. A final measurement of the room determined that I had underestimated the amount of available space in the room which allowed me to increase the shower dimensions to 34" x 48". This was a critical adjustment as it allows me to use a sliding door instead of one that pivots, thereby providing me with more options for layout. There is enough room for the 48" shower pan, 31" sink, wall, and drywall on both walls of the bathroom and there is one inch to spare. After joists, the plumbing will be installed. Before the floor and drywall go in, we'll be also installing all electric wiring, sockets, switches, and outlets. For now, all electrical circuits in this room will feed from the attic from a junction box that we will connect up to a main circuit later. Since I'm ripping drywall off all walls in the house imminently, that will be the most appropriate, and certainly easiest time to do all wiring for the forseeable future, and perhaps beyond. Of course, this includes all electrical wiring and outlets. However, the house will also be well networked. The office will be the hub for all wiring, network and otherwise. For each room, I will have at least one, and possibly more cat5 connections, including both bathrooms, attic, dungeon, and kitchen. In addition, cat5 will be run to several locations on the hallway walls where pictures will hang to provide for digital picture frames. Also, all locations where cams will have connections. Automation for pan/tilt/zoom can therefore be provided, or if in the future I install network cams, I'll have the infrastructure in place. Although cat5 will definitely suffice for now, I'm considering planning for the future by installing either cat5e or cat6. I'm also considering installing fibre, even though I have absolutely no use for it at this time. The living/dining room and all three bedrooms will have a wiring bus installed with rca video/audio, svideo, and cable that will have common connections on the walls in 6-8 locations throughout the room. This way, speakers can be plugged in anywhere without running extra wires, and the tv and vcr/dvd/stereo don't have to be in the same location in the room. Each of the bedrooms will have a somewhat minimised version of this. Each of the rooms' busses will also run back to the office so video/audio can be fed from there. A video/audio source will also play constantly on an unused cable channel, and that source can then select from an archive of stored media and played back on any television/stereo in the house, either using the computer, or a homebrewed interface.
November 10, 2004 16:50
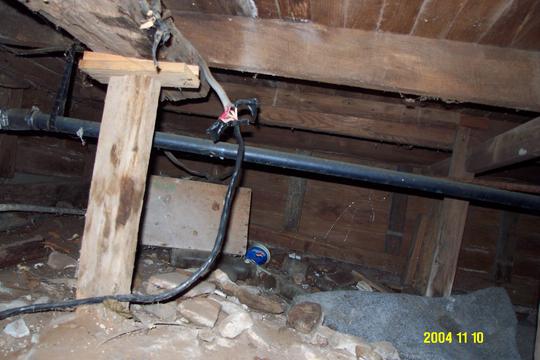
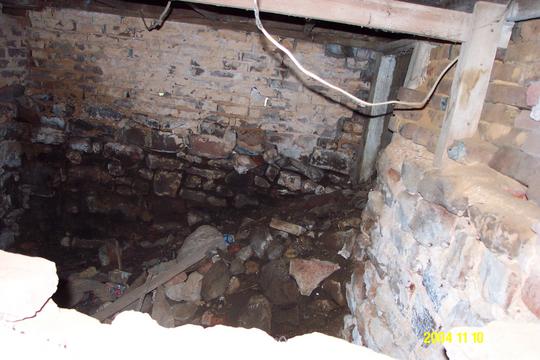
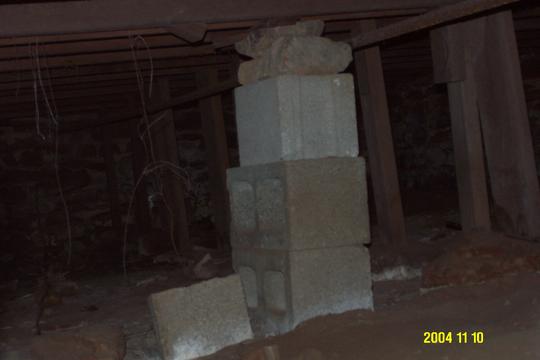
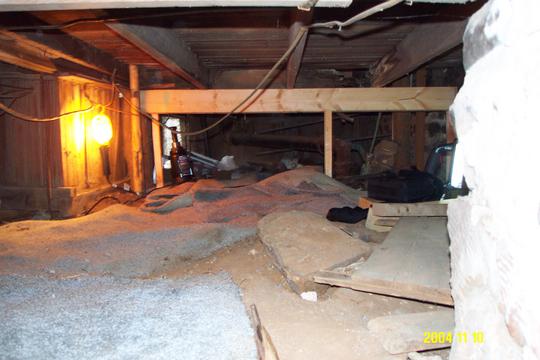
The Dungeons of DMIToday I took some pictures of the crawlspace under the house, for now on known as the dungeons of DMI until someone comes up with a name that is moderately less corny.
This is a picture from just inside the door.
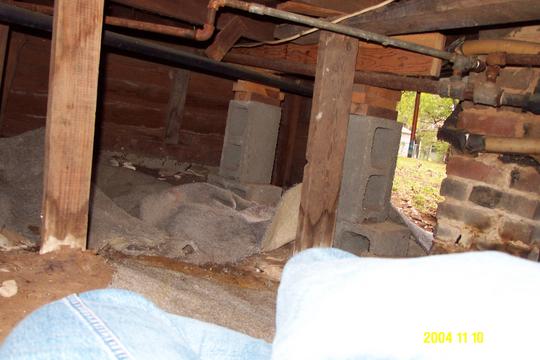
And a picture of my legs.... and a view looking back out the door.
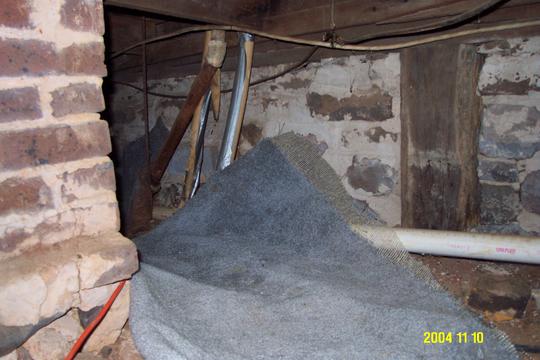
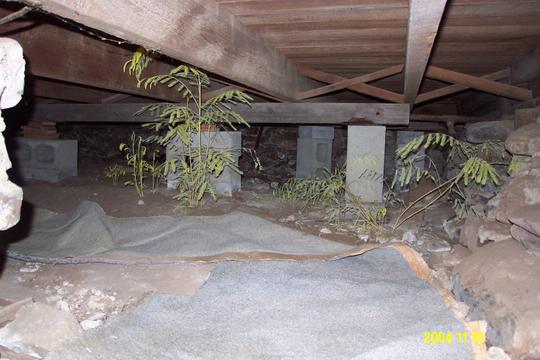
Venturing deeper. Yes, that is carpet. Yes, there is carpet in my dungeon. Yes, I put it there. I realize having a carpeted dungeon takes away some of the ambience, but knees are fragile things. Ok.. fine.. I'm a wuss.
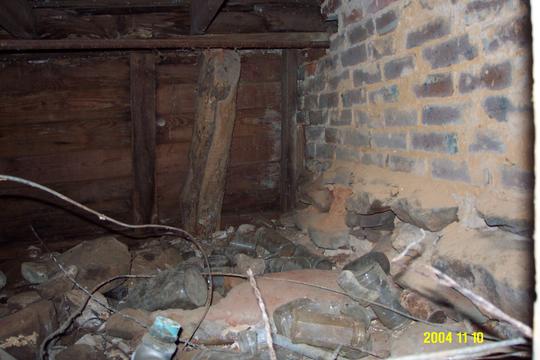
Some of the many reasons why there is now carpeting in my dungeon.
The pit. This was either a storm cellar or a cistern. Or maybe even both. There's an entry way framed on the right side that's been boarded up at some point, so maybe they made tornados obsolete in Denison and figured they no longer needed it. Who knows.
The area under the dining room. Yes, those are plants. Yes, they're alive. No, I have no clue what they're doing down there. It's even more mysterious because there's normally very little light and no water. Very curious.
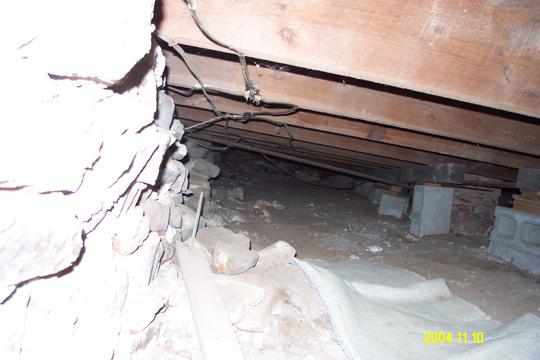
The carpeting comes to an end. Gonna have to rough it from here on out.
The hole. This is the only way to get into the area of the house under the main hallway and office. Fitting through there will be no small challenge.
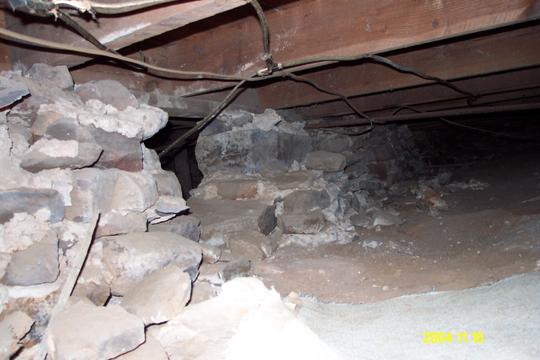
A peek inside the hole. Not gonna crawl in there today.
A temporary brace to hold up the end of the hallway. The only thing holding it up before was a rotted beam and the walls on either side. In other words, not much.
Heading back out.
November 07, 2004 12:45
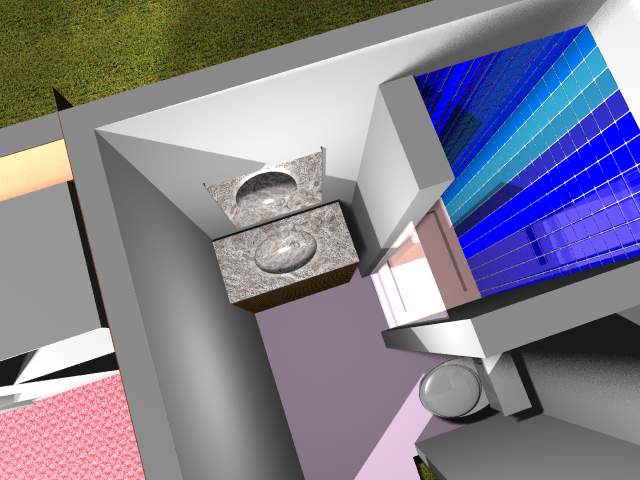
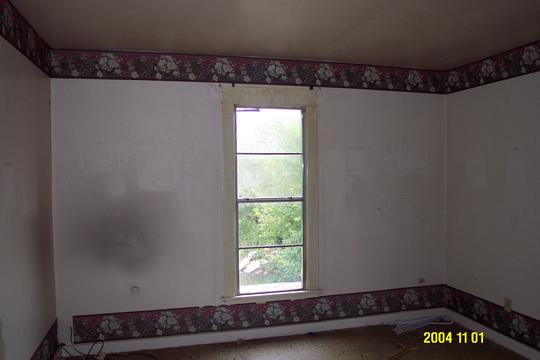
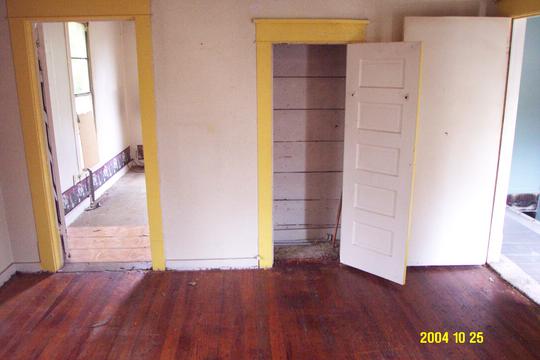
Upstairs BathroomHere's a status update for this week. There are two photo indexes added showing pictures of the progress. The biggest impact has been in the upstairs bathroom. Here is what it looks like now:
And the planned layout:
The tiles in the shower will most likely be blue, but we're still trying to find the right shade, hence the multitude of them. No, we're not REALLY going to choose some tacky tile layout, fear not. The sink is 18" deep, which is kinda narrow, but unfortunately, the room just isn't terribly cooperative with its dimensions. The shower is a 32"x40" which is the largest I'm able to fit in there. There will be a cabinet below the sink and also cabinets around the room where they don't interfere with anything, especially above the 7' mark. With 9' high ceilings, I have lots of room for cabinet space up above, even if nobody but I can reach them. :)
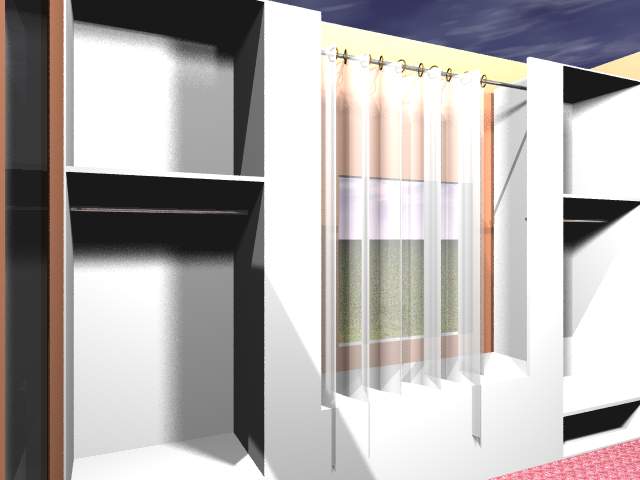
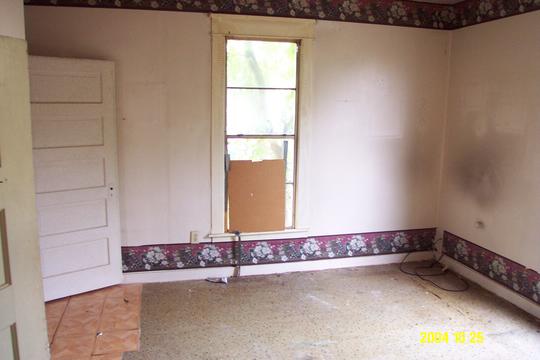
And in the back bedroom, planning commences on the wall layout. Similar in some respects to the master bedroom bedwall, this room will have the dual armoires but the bed won't use it as a headboard. Instead, there will be a window seat and the curtain for the window will hang from a bar just on the inside of the window seat area. More planning still to do on this. The area under the window seat will have dresser drawers, and there will likely be some drawers on one side or the other. The window seat area will have bookshelves on one side and possibly a foldout desk on the other. And of course the seat will be padded and there will be pillows. What it looks like now:
And the first draft:
October 26, 2004 21:44
DeconstructionI've got the wireless transmitter working now, despite my best accidental efforts to destroy it. Also spent some time knocking down walls. Here are some pictures.
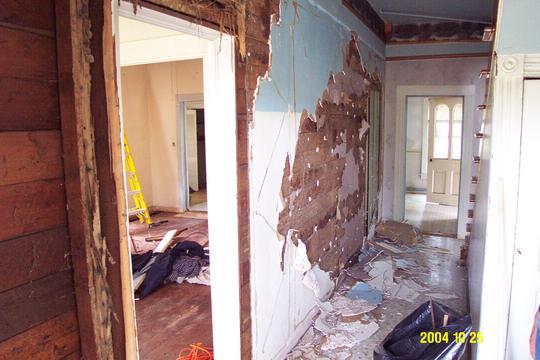
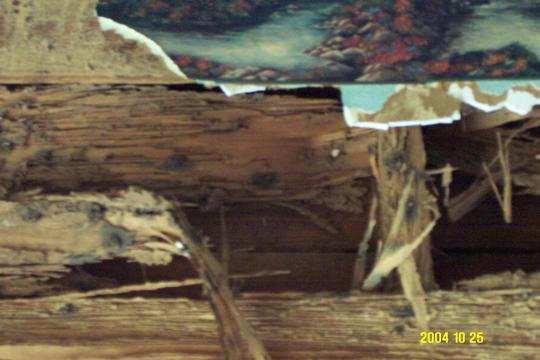
Here is the hallway with most of the plaster ripped off. There was extensive termite damage to this wall.
Very hungry little critters. At least they're all gone.
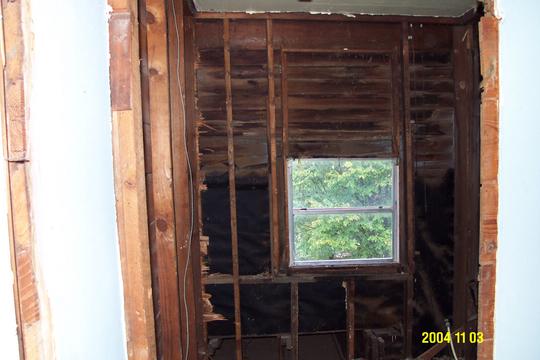
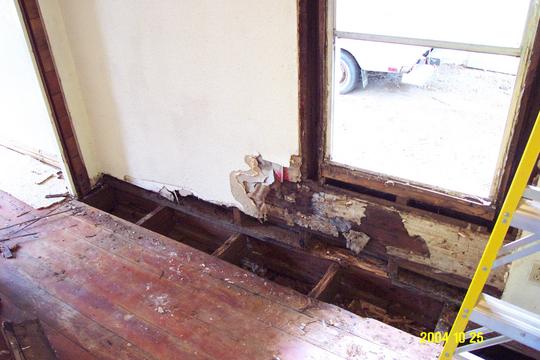
This is the dining room with two of the damaged floorboards removed and the frame around the window removed. There was quite a bit of water damage in this floor and wall, and therefore we'll be removing and replacing 4 of the floorboards as well as replacing part of the sill and adding an extra joist for support.
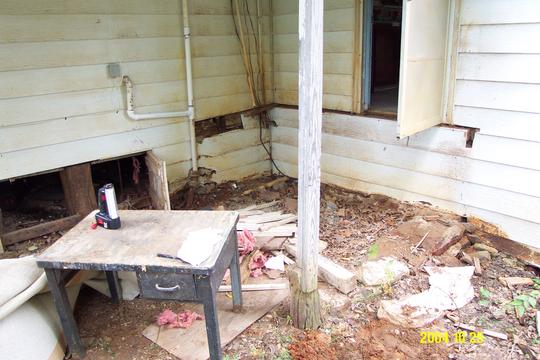
This is the area where the utility room will be built. The wall with the pipes and wires is one of the walls to the downstairs bathroom which will be torn out and rebuilt when the utility room is built.
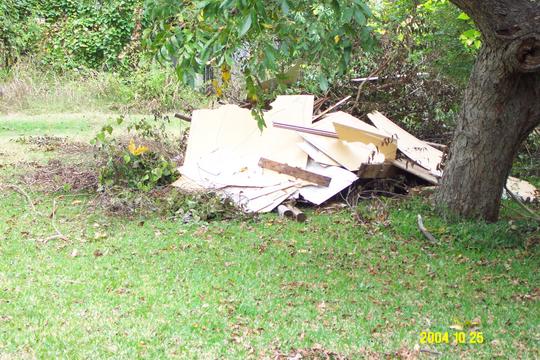
The ever growing pile of garbage. If it's cost effective, I'll eventually haul this away to a dump. Otherwise I'll just order a dumpster and have it taken away that way.
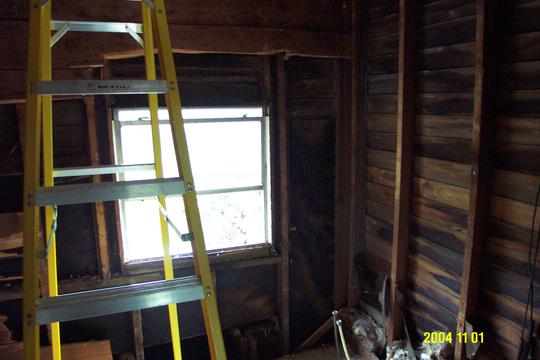
This wall in what will one day be the master bedroom will be torn down and rebuilt with a bedwall.
And the same wall in the other bedroom. Likely this will just be a flat wall. A similar bedwall will be built around the window.
Yeah, that's the one. :) I'll cover the bathroom demolition project tomorrow.
October 23, 2004 01:59
Cams and wood eating crittersDespite a false start getting the internet connection working, I now have a fully functional connection, completely with cams. I had intended to use the wireless transmitter so I could have the camera follow me around the house wherever I happened to be working, but I was one cable shy of being able to do that, so I had to settle for using the cam in the office and hallway. No worries, there was plenty to do in the hall. The wallcoverings on the hallway walls consist of wooden boards, wallpaper, plaster, and then this cheap cardboard paneling. On top of all of that is this ugly trim, in two rows... and not even parallel. Not really anyway. So it all goes. I start at the kitchen and work my way toward the front door ripping off the paneling. When I get to the doorway leading into the living room I pull on the panelling..... And everything comes off all at once, down to the wood. And by everything, I also mean part of the door frame. Yes ladies and gentlemen... I found the termite damage. The boards are well munched through, covering an area of 5-6 feet, mostly near the ceiling. I'm not sure about the condition of the studs in the wall yet. After taking out the eaten boards I'll see if I need to do any further repairs in the wall. It IS a load bearing wall, so it's probably a good idea to fix it. :) If the damage extends to the upstairs wall, forcing a significant replacement of material in that wall as well, I'll likely move the doorway over by one stud, thereby giving me an extra 18 inches between the two doorways, and therefore allowing for a more extensive bedwall. However, we've already considered other options, so it might not be much of an issue anymore.
|